top of page
Home
About
Thinking of Joining
Location
Visitors map
Gallery
Competitions
Search Competitions
Roll of Honour
Feedback
Viewer
Inspiration
Cornwall
Before and After
Programme
Videos
Photoshop in 30 days
Portfolios
Meet The Members
Members with portfolios
Members only
External
Contact Us
Documents
Acronyms
Competition Rules
Competition images
Competitions Internal
Constitution
Disciplinary Code
GDPR & Form
Instagram
Nature/Wildlife
Pinterest
Mastering your camera
Safeguarding
Twitter
Welcome Pack 1
Welcome Pack 2
Where to Eat
Processes
Photographic Process
Winning Competitions
WCPF Rules N&W
Colour Grading Guide
Exposure triangle
Depth of Field
Focus Stacking Calculator
Histogram Magic
Mode Dial Navigator
Moving to Manual
ND Filter calculator
Sun and tides
Weather guess
More
Use tab to navigate through the menu items.
Photoshop in 30 days
Play Video
Play Video
04:15
Welcome to 30 Days of Photoshop!
▶ Download the practice files for this tutorial (free with a PHLEARN account): https://phlearn.com/tutorial/30-days-photoshop-introduction/ 30 Days of Photoshop is PHLEARN's free, ground-up path from "I've never opened Photoshop" to confidently retouching, compositing, and editing raw photos — one short lesson a day for 30 days, completely free. This intro walks through what each stretch of the series covers: the Photoshop basics, intermediate tools and techniques, goal-based skills like object removal and raw editing, portrait retouching, compositing, and landscape editing — plus what you get when you sign up (a calendar, a PDF with every episode description, weekly emails, and downloadable sample images and PSDs to follow along). CHAPTERS 00:00 What 30 Days of Photoshop is 00:43 What you get when you sign up 01:43 Days 1–5: Photoshop basics 01:58 Days 6–15: Intermediate tools and techniques 02:51 Days 16–24: Goal-based skills and raw editing 03:24 Days 25–30: Compositing and landscapes WHAT YOU'LL LEARN 1. The basics: touring Photoshop, opening/editing/saving images, layers, masks, and adjustment layers. 2. Intermediate tools: levels and curves, hue/saturation, transforms, the brush tool, cropping, type, liquify, smart objects, and simple composites. 3. Goal-based skills: removing distractions, dodging and burning, photo collages, and editing raw images in Adobe Camera Raw. 4. Portrait retouching: blemish removal, frequency separation, and a full portrait edit across three episodes. 5. Compositing: cutting objects (and hair) out of backgrounds with the Pen Tool, and matching color and light between photos. 6. Landscapes: editing raw landscapes and swapping skies seamlessly. ― PHLEARN PRO: every PRO tutorial, one membership ◦ 200+ in-depth courses and masterclasses on Photoshop, Lightroom and photography ◦ 1,000+ downloadable PSDs, RAW images and sample files to follow along ◦ Presets, Photoshop actions and LUTs included ◦ New PRO tutorials every month, streamed in 4K with captions and chapters ◦ Rated 4.93/5 by 3,900+ students ◦ Cancel anytime, 100% money-back guarantee ▶ https://phlearn.com/pro ― Follow us on social! Instagram: https://www.instagram.com/phlearn/ Facebook: https://facebook.com/phlearn Twitter: https://twitter.com/phlearn #Photoshop #PhotoshopTutorial #LearnPhotoshop
Play Video
Play Video
13:50
Let's Take a Tour of Photoshop! | Day 1
▶ Download the sample images and PDF guide for this tutorial (free with a PHLEARN account): https://phlearn.com/tutorial/30-days-photoshop-tour/ A full tour of Photoshop for anyone just getting started — every panel, tool, and menu explained, plus how to save your own custom workspace so the program stops feeling overwhelming. CHAPTERS 00:00 Why Photoshop beats simpler editors 01:39 Opening the sample image and going full screen 02:21 A quick overview of tools, options, and palettes 02:33 Touring the toolbar 03:41 Understanding the options bar 04:26 Working with palettes and panels 06:43 Saving and loading custom workspaces 08:33 Layers, the cornerstone of your workflow 09:52 A tour of the menu bar THE STEPS 1. Open your image, hit F to go full screen, and get oriented with the three main areas: the toolbar, the options bar, and your palettes. 2. Click through the toolbar to see what each tool does — selections, crop, healing, brush, dodge and burn, the pen tool, and more. 3. Notice how the options bar changes based on whichever tool you have selected. 4. Open, close, and rearrange your palettes from the Window menu, and combine or separate them to match how you work. 5. Save a custom layout by going to Window, then Workspace, then New Workspace, so you can switch between setups instantly. 6. Get familiar with the Layer menu, since layers are where most of your editing actually happens. 7. Skim the rest of the menu bar (File, Edit, Image, Select, Filter, View, Help) so you know roughly where everything lives before diving into the rest of the series. Sign up for 30 Days of Photoshop: https://phlearn.com/30-days-of-photoshop-signup Go deeper with the PHLEARN PRO course “Frequency Separation: How to Master Retouching in Photoshop”: https://phlearn.com/tutorial/amazing-power-frequency-separation-retouching-photoshop/ ― PHLEARN PRO: every PRO tutorial, one membership ◦ 200+ in-depth courses and masterclasses on Photoshop, Lightroom and photography ◦ 1,000+ downloadable PSDs, RAW images and sample files to follow along ◦ Presets, Photoshop actions and LUTs included ◦ New PRO tutorials every month, streamed in 4K with captions and chapters ◦ Rated 4.93/5 by 3,900+ students ◦ Cancel anytime, 100% money-back guarantee ▶ https://phlearn.com/pro ― Follow us on social! Instagram: https://www.instagram.com/phlearn/ Facebook: https://facebook.com/phlearn Twitter: https://twitter.com/phlearn #Photoshop #PhotoshopBasics #PhotoshopForBeginners
Play Video
Play Video
22:25
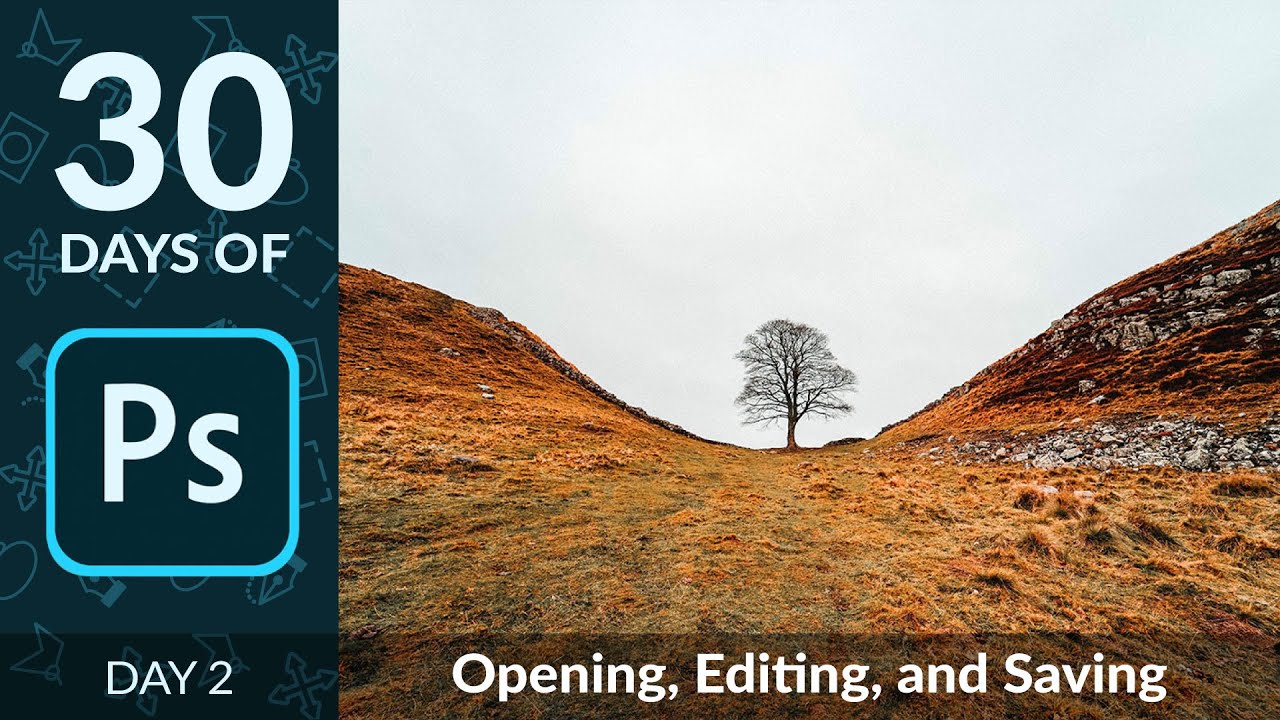
Opening, Editing & Saving in Photoshop | Day 2
▶ Download the sample images and PDF guide for this tutorial (free with a PHLEARN account): https://phlearn.com/tutorial/30-days-photoshop-opening-editing-saving/ Opening, editing, and saving images the non-destructive way in Photoshop — combine two photos, remove a tree, swap a sky, and save your work as a layered PSD, a web-ready JPEG, and a transparent PNG. CHAPTERS 00:00 Why non-destructive editing matters 01:21 Opening multiple images and arranging windows 02:58 Combining two images into one document 04:45 Removing the tree non-destructively 07:18 Replacing the sky and blending it in 08:57 Masking the sky to just the background 11:28 Saving a layered PSD 13:44 Saving a flattened JPEG for the web 16:23 Cutting out the tree and saving a transparent PNG THE STEPS 1. Open both images, arrange them as windows instead of tabs from Window, then Arrange, and drag one image's layer into the other with the Move tool to combine them. 2. Add a new layer above the background and use the Spot Healing Brush, set to Content-Aware and Sample All Layers, to paint out an object without touching the original layer. 3. Transform a new sky layer into place, change its blend mode to Multiply or Darken, then use the Magic Wand to select the horizon and add a layer mask so it only shows where you want it. 4. Save a layered file first: File, then Save As, then choose Photoshop (PSD) or TIFF to keep every layer editable. 5. Save a flattened copy for the web: File, then Save As, then JPEG — this bakes in your edits and drops the layers. 6. To isolate an object on a transparent background, use Select, then Color Range, duplicate the selection to a new layer, crop to it, then Save As PNG. Sign up for 30 Days of Photoshop: https://phlearn.com/30-days-of-photoshop-signup ― PHLEARN PRO: every PRO tutorial, one membership ◦ 200+ in-depth courses and masterclasses on Photoshop, Lightroom and photography ◦ 1,000+ downloadable PSDs, RAW images and sample files to follow along ◦ Presets, Photoshop actions and LUTs included ◦ New PRO tutorials every month, streamed in 4K with captions and chapters ◦ Rated 4.93/5 by 3,900+ students ◦ Cancel anytime, 100% money-back guarantee ▶ https://phlearn.com/pro ― Follow us on social! Instagram: https://www.instagram.com/phlearn/ Facebook: https://facebook.com/phlearn Twitter: https://twitter.com/phlearn #Photoshop #PhotoshopBasics #NonDestructiveEditing
Play Video
Play Video
25:33
How to Use Layers & Masks in Photoshop | Day 3
▶ Download the practice files for this tutorial (free with a PHLEARN account): https://phlearn.com/tutorial/30-days-photoshop-how-to-use-layers/ Layers and masks explained with a bowl of citrus fruit — paint, clone, and mask your way to turning a lemon into a lime, duplicating an orange, and building type into an image, all without ever touching the original photo. CHAPTERS 00:00 Why layers work like a stack of paper 02:47 Creating a new layer and understanding opacity 04:44 Exploring blend mode groups 06:11 Turning a lemon into a lime with the Hue blend mode 08:01 Cloning an orange with the Clone Stamp tool 09:51 Layer masks: hiding and restoring with black and white 11:31 Transforming and warping a cloned layer 13:06 Black & White adjustment layers and their masks 15:41 Adding a type layer 17:35 Masking the type layer 20:48 Clipping a shadow onto your text 23:14 Grouping and organizing your layers THE STEPS 1. Create a new layer, paint on it, and notice it doesn't affect anything below until you change its opacity or blend mode. 2. Try the Hue blend mode to recolor an object using only a rough paint layer, then fine-tune with Image, then Adjustments, then Hue/Saturation. 3. Use the Clone Stamp tool set to Sample Current and Below, Option/Alt-click a source area, and paint on a new layer to duplicate part of your image non-destructively. 4. Add a layer mask (the icon that looks like a rectangle with a circle cut out) and paint black to hide, white to reveal — nothing is ever permanently erased. 5. Add a Black & White adjustment layer above only the layers you want desaturated, and use its mask to keep specific areas in color. 6. Add type with the Type tool, adjust it in the Character or Properties panel, then mask parts of it behind other elements in your image. 7. Right-click a layer and choose Create Clipping Mask to confine an effect (like a shadow) to exactly the shape of the layer below it. 8. Group related layers together, color-code them, and label everything so a complex file stays easy to navigate. Sign up for 30 Days of Photoshop: https://phlearn.com/30-days-of-photoshop-signup Master every selection and mask in the new PHLEARN PRO course “The Ultimate Guide to Selections & Masking in Photoshop”: https://phlearn.com/tutorial/selections-and-masking-in-photoshop/ ― PHLEARN PRO: every PRO tutorial, one membership ◦ 200+ in-depth courses and masterclasses on Photoshop, Lightroom and photography ◦ 1,000+ downloadable PSDs, RAW images and sample files to follow along ◦ Presets, Photoshop actions and LUTs included ◦ New PRO tutorials every month, streamed in 4K with captions and chapters ◦ Rated 4.93/5 by 3,900+ students ◦ Cancel anytime, 100% money-back guarantee ▶ https://phlearn.com/pro ― Follow us on social! Instagram: https://www.instagram.com/phlearn/ Facebook: https://facebook.com/phlearn Twitter: https://twitter.com/phlearn #Photoshop #PhotoshopBasics #LayerMasks
Play Video
Play Video
21:17
How to Use Adjustment Layers in Photoshop | Day 4
▶ Download the practice files for this tutorial (free with a PHLEARN account): https://phlearn.com/tutorial/30-days-photoshop-how-to-use-adjustment-layers/ In Day 4 of 30 Days of Photoshop, learn every major adjustment layer in Photoshop and how to use each one to edit your photos non-destructively. We work through Brightness/Contrast, Levels, Curves, Vibrance, Hue/Saturation, Color Balance, Black & White, Photo Filter, Channel Mixer, Gradient Map, and Selective Color, then group them together to compare a full before and after. CHAPTERS 00:00 Why adjustment layers are non-destructive 01:12 Brightness/Contrast adjustment layer 03:14 Levels adjustment layer 05:00 Curves adjustment layer 06:51 Vibrance adjustment layer 08:09 Hue/Saturation adjustment layer 13:28 Color Balance adjustment layer 14:27 Black & White adjustment layer 15:12 Photo Filter adjustment layer 15:50 Channel Mixer adjustment layer 18:34 Gradient Map adjustment layer 19:29 Selective Color adjustment layer THE STEPS 1. Go to Layer, then New Adjustment Layer, to see every option available 2. Use Levels or Curves for precise brightness and contrast control 3. Use Vibrance to boost saturation without oversaturating skin tones 4. Use Hue/Saturation to shift or intensify specific colors 5. Use Color Balance or Selective Color for targeted color grading 6. Use Black & White or Gradient Map for tonal and color-toning effects 7. Group all your adjustment layers together 8. Lower the group's opacity to blend the before and after Sign Up for 30 Days of Photoshop: https://phlearn.com/30-days-of-photoshop-signup ― PHLEARN PRO: every PRO tutorial, one membership ◦ 200+ in-depth courses and masterclasses on Photoshop, Lightroom and photography ◦ 1,000+ downloadable PSDs, RAW images and sample files to follow along ◦ Presets, Photoshop actions and LUTs included ◦ New PRO tutorials every month, streamed in 4K with captions and chapters ◦ Rated 4.93/5 by 3,900+ students ◦ Cancel anytime, 100% money-back guarantee ▶ https://phlearn.com/pro ― Follow PHLEARN Instagram: https://www.instagram.com/phlearn/ Facebook: https://www.facebook.com/PHLEARN Twitter: https://twitter.com/PHLEARN #Photoshop #PhotoshopBasics #AdjustmentLayers
Play Video
Play Video
25:35
How to Create Selections in Photoshop | Day 5
▶ Download the sample images and PDF guide for this tutorial (free with a PHLEARN account): https://phlearn.com/tutorial/30-days-photoshop-create-selections/ In Day 5 of 30 Days of Photoshop, learn every major selection tool in Photoshop, then use them to cut a person out of their background and change the color of their lips and eyes. We work through the Marquee, Lasso, Magic Wand, Quick Selection, and Color Range tools, refine a selection with Select and Mask, try the one-click Select Subject tool, and finish by saving and loading selections so you can reuse them later. CHAPTERS 00:00 An intro to selections, Day 5 01:00 Marquee tools: rectangle and ellipse 05:30 Lasso, Polygonal Lasso, and Magnetic Lasso 08:00 Magic Wand and Quick Selection tools 11:40 Color Range for tricky selections 15:42 Refining edges with Select and Mask 17:20 Select Subject: one-click AI selection 21:12 Saving and loading selections THE STEPS 1. Use the Marquee tools for simple rectangular or elliptical selections 2. Use the Lasso, Polygonal Lasso, or Magnetic Lasso for freeform shapes 3. Use the Magic Wand or Quick Selection tool to select by color and edges 4. Use Color Range to select a specific color, like lips or eyes 5. Open Select and Mask to refine a selection's edges 6. Try Select Subject for a fast, automatic selection 7. Use your selection as a layer mask to isolate an edit 8. Save a selection so you can load and reuse it later Sign Up for 30 Days of Photoshop: https://phlearn.com/30-days-of-photoshop-signup Master every selection and mask in the new PHLEARN PRO course “The Ultimate Guide to Selections & Masking in Photoshop”: https://phlearn.com/tutorial/selections-and-masking-in-photoshop/ ― PHLEARN PRO: every PRO tutorial, one membership ◦ 200+ in-depth courses and masterclasses on Photoshop, Lightroom and photography ◦ 1,000+ downloadable PSDs, RAW images and sample files to follow along ◦ Presets, Photoshop actions and LUTs included ◦ New PRO tutorials every month, streamed in 4K with captions and chapters ◦ Rated 4.93/5 by 3,900+ students ◦ Cancel anytime, 100% money-back guarantee ▶ https://phlearn.com/pro ― Follow PHLEARN Instagram: https://www.instagram.com/phlearn/ Facebook: https://www.facebook.com/PHLEARN Twitter: https://twitter.com/PHLEARN #Photoshop #PhotoshopBasics #Selections
Play Video
Play Video
16:21
How to Use Levels & Curves in Photoshop | Day 6
▶ Download the practice files for this tutorial (free with a PHLEARN account): https://phlearn.com/tutorial/30-days-photoshop-levels-curves/ Day 6 of 30 Days of Photoshop: Levels and Curves are the two most powerful adjustment layers in Photoshop, controlling not just light and dark but every color in your image. Aaron compares Levels and Curves side by side, showing how each affects brightness, contrast, and color channels, then builds a warm red-orange solar flare using targeted color channel adjustments and a radial gradient mask. CHAPTERS 00:00 Day 6 of 30 Days of Photoshop: Levels & Curves 01:07 Adding Levels & Curves Adjustment Layers 01:23 How Input & Output Levels Work 03:36 How Curves Work 05:11 Curves vs Levels: The Midpoint Difference 07:07 Setting Black, White, and Gray Points 09:54 Adjusting Color with Levels & Curves 11:47 Adding a Red-Orange Solar Flare Effect THE STEPS 1. Go to Layer, then New Adjustment Layer, and add both a Levels and a Curves layer to compare them 2. In Levels, drag the black and white point sliders in from the edges of the histogram to set your darkest and lightest tones, then use the midpoint slider for overall brightness 3. In Curves, click points on the diagonal line, dragging up for brighter and down for darker, using an S-curve, dark end down and light end up, to add contrast 4. Use the eyedroppers in either panel to click and set a custom black point, white point, or gray point, perfect for white balance off a gray card 5. In Curves, use the hand or targeted adjustment tool to click directly on an area of your photo and drag to adjust that exact tonal range 6. Switch from RGB to the individual Red, Green, or Blue channel in either panel to push color into your shadows, midtones, or highlights 7. Build a warm flare by adding red to the shadows on the Red channel, then pulling the midpoint down on the Blue channel to add yellow 8. Invert the adjustment layer's mask (Cmd/Ctrl+I), then use the Gradient tool with a foreground-to-transparent radial gradient to fade the effect in from one side Get the full step by step breakdown here: https://phlearn.com/tutorial/30-days-photoshop-levels-curves/ ― PHLEARN PRO: every PRO tutorial, one membership ◦ 200+ in-depth courses and masterclasses on Photoshop, Lightroom and photography ◦ 1,000+ downloadable PSDs, RAW images and sample files to follow along ◦ Presets, Photoshop actions and LUTs included ◦ New PRO tutorials every month, streamed in 4K with captions and chapters ◦ Rated 4.93/5 by 3,900+ students ◦ Cancel anytime, 100% money-back guarantee ▶ https://phlearn.com/pro ― Follow PHLEARN: Instagram: https://instagram.com/phlearn Facebook: https://facebook.com/phlearn Twitter: https://twitter.com/phlearn #Photoshop #30DaysOfPhotoshop #PhotoEditing
Play Video
Play Video
16:38
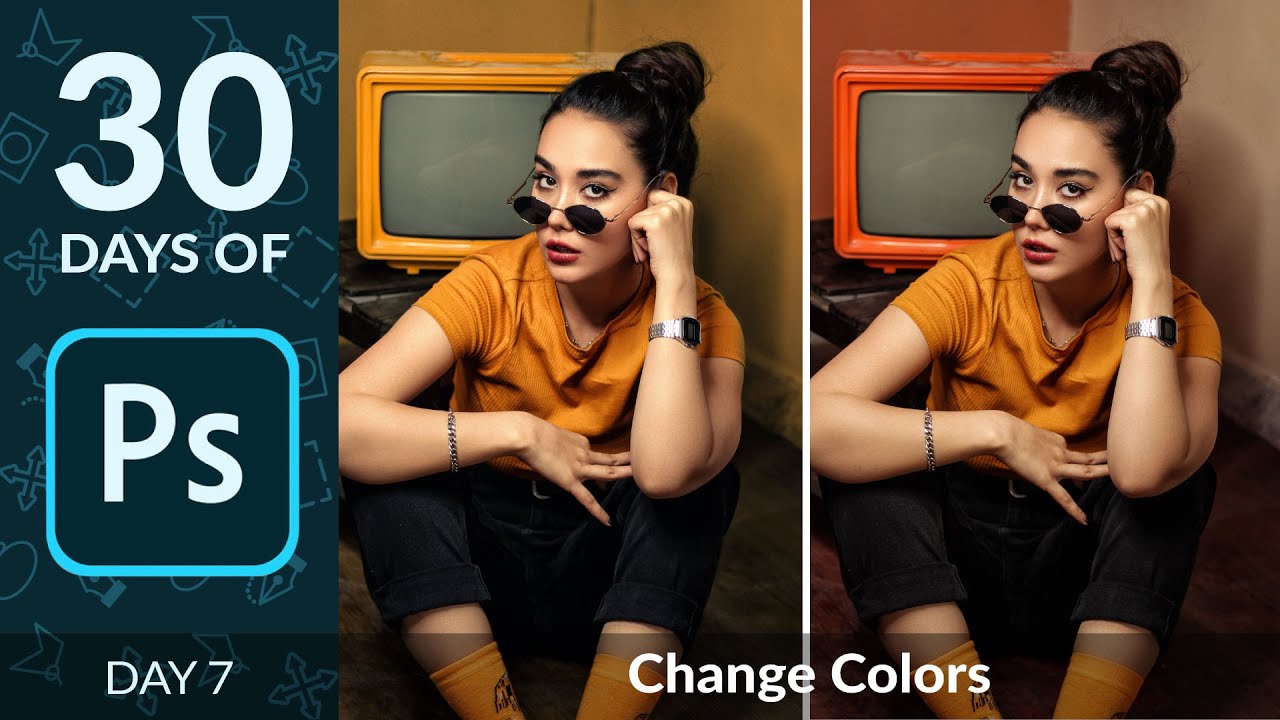
How to Change Any Color with Hue/Saturation in Photoshop | Day 7
▶ Download the sample images and PDF guide for this tutorial (free with a PHLEARN account): https://phlearn.com/tutorial/30-days-photoshop-hue-saturation/ Day 7 of 30 Days of Photoshop: learn how to change any color in your photo using Hue/Saturation and Color Balance adjustment layers, from targeting specific colors to recoloring an entire wall. Aaron shifts the background colors in a photo to match his subject's clothing, using the eyedropper to target exactly the right color range in Hue/Saturation, masking the effect off the subject's skin so it stays natural, colorizing a plain wall a completely new color, and finishing with Color Balance to tone shadows, midtones, and highlights. CHAPTERS 00:00 Changing any color with Hue/Saturation, Day 7 03:43 Targeting specific colors with the eyedropper 06:59 Masking the color effect off your subject 09:38 Colorizing a wall with Hue/Saturation 13:48 Toning shadows, midtones and highlights with Color Balance THE STEPS 1. Add a Hue/Saturation adjustment layer (Layer, then New Adjustment Layer) 2. Use the eyedropper to click the color you want to target, narrowing the range as needed 3. Adjust Hue, Saturation, and Lightness to shift that color 4. Paint black on the layer mask to protect areas like skin from the effect 5. For a full recolor, add another Hue/Saturation layer and check Colorize, then mask in just the area you want 6. Finish with a Color Balance adjustment layer to add complementary color into your shadows, midtones, and highlights Get the full step by step breakdown here: https://phlearn.com/tutorial/30-days-photoshop-hue-saturation/ ― PHLEARN PRO: every PRO tutorial, one membership ◦ 200+ in-depth courses and masterclasses on Photoshop, Lightroom and photography ◦ 1,000+ downloadable PSDs, RAW images and sample files to follow along ◦ Presets, Photoshop actions and LUTs included ◦ New PRO tutorials every month, streamed in 4K with captions and chapters ◦ Rated 4.93/5 by 3,900+ students ◦ Cancel anytime, 100% money-back guarantee ▶ https://phlearn.com/pro ― Follow PHLEARN: Instagram: https://instagram.com/phlearn Facebook: https://facebook.com/phlearn Twitter: https://twitter.com/phlearn #Photoshop #ColorGrading #30DaysOfPhotoshop
Play Video
Play Video
25:11
Scale, Rotate & Align with Transform in Photoshop | Day 8
▶ Download the sample images and PDF guide for this tutorial (free with a PHLEARN account): https://phlearn.com/tutorial/30-days-photoshop-transform/ Day 8 of 30 Days of Photoshop is all about the Transform tool: scaling, rotating, and precisely aligning multiple elements so a composite actually looks intentional instead of eyeballed. Aaron Nace builds a donut shop logo from scratch, combining photos and type, to show exactly how professional designers keep everything lined up. You'll learn every option inside the Transform dialogue (the movable reference point, X/Y/width/height, angle, shear, and warp), why converting layers to Smart Objects before heavy scaling protects image quality, how guides make rotation precise, and how to use selection-based alignment to center type, logos, and objects perfectly against each other or the whole canvas. CHAPTERS 00:00 Intro to Transform, Scale, Rotate & Align 00:51 Bringing assets into one document and cropping 02:22 The full Transform dialogue: reference point, X/Y, angle, shear, warp 06:08 Why Smart Objects protect quality when scaling 08:13 Building the logo layout with guides for precise rotation 10:26 Cleaning up with a layer mask 13:22 Positioning the second donut and filling in the background 16:29 Adding type and aligning to a selection 19:22 Centering the donut icon inside the text 24:44 Wrap-up THE STEPS 1. Bring all your source images and graphics into one document with the Move tool, then crop without deleting cropped pixels so you can recover them later. 2. Use Ctrl/Cmd+T to open Transform, and move the reference point to control exactly what your rotation or scale pivots around. 3. Convert layers to Smart Objects before major scaling or rotation so you don't permanently lose image resolution. 4. Turn on rulers and drag out guides to rotate and align elements with precision instead of eyeballing it. 5. Use a layer mask with the Rectangular Marquee tool to hide any uneven edges left over from rotation. 6. Add your type, then select all (Ctrl/Cmd+A) or make a marquee selection around a specific object to unlock the Move tool's alignment buttons — left, center, right, top, middle, and bottom. 7. Group related layers together (like a wordmark and its icon) so you can move and align them as a single unit. Sign Up for 30 Days of Photoshop: https://phlearn.com/30-days-of-photoshop-signup Join the 30 Days of Photoshop Challenge and get a new free lesson delivered every day, along with sample images and bonus extras. ― PHLEARN PRO: every PRO tutorial, one membership ◦ 200+ in-depth courses and masterclasses on Photoshop, Lightroom and photography ◦ 1,000+ downloadable PSDs, RAW images and sample files to follow along ◦ Presets, Photoshop actions and LUTs included ◦ New PRO tutorials every month, streamed in 4K with captions and chapters ◦ Rated 4.93/5 by 3,900+ students ◦ Cancel anytime, 100% money-back guarantee ▶ https://phlearn.com/pro ――――――――――――――――― Follow PHLEARN: Instagram: https://www.instagram.com/phlearn/ Facebook: https://www.facebook.com/phlearn Twitter: https://twitter.com/phlearn #Photoshop #30DaysOfPhotoshop #PhotoshopTutorial
Play Video
Play Video
17:36
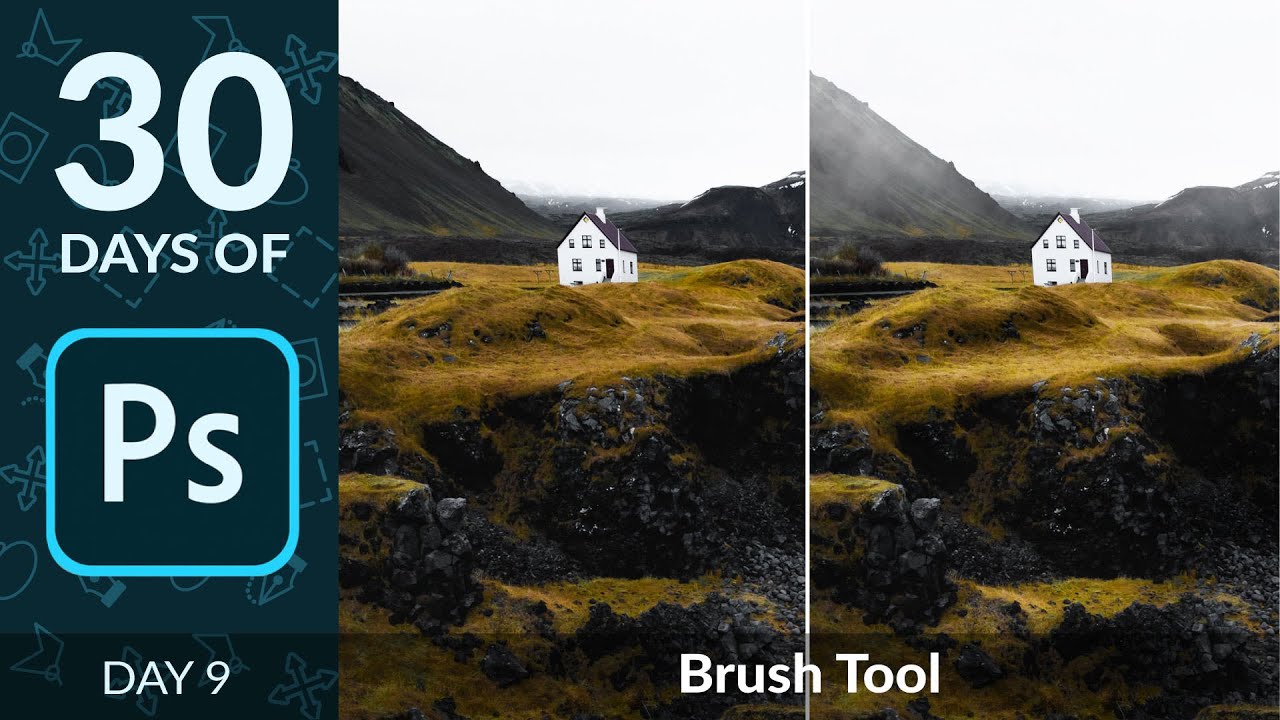
How to Use the Brush Tool in Photoshop | Day 9
▶ Download the sample images, Photoshop brush and PDF guide for this tutorial (free with a PHLEARN account): https://phlearn.com/tutorial/30-days-photoshop-brush-tool/ Day 9 of 30 Days of Photoshop: the Brush tool is one of the most overlooked tools in Photoshop, and it can dodge and burn your photos or paint custom textures like fog. Aaron shows how a pressure-sensitive tablet changes how you paint, why lowering Flow (not Opacity) gives you the smoothest natural buildup for dodging and burning with light, and how to turn any photo, in this case a cloud, into a fully custom brush with realistic size and angle variation for painting in fog and atmosphere. CHAPTERS 00:00 Day 9: The Power of the Brush Tool 01:14 Why Use a Pressure-Sensitive Tablet 03:26 Flow vs Opacity Explained 05:18 Dodging and Burning with Low Flow 10:56 Turning a Cloud Photo into a Brush 13:56 Adding Jitter for a Natural Look 15:49 Painting Fog into Your Image THE STEPS 1. Select the Brush tool (B) and use a soft round brush 2. Add a Curves adjustment layer, then invert its mask (Cmd/Ctrl+I) to hide the effect 3. Keep Opacity at 100% and lower Flow instead, for a smooth, natural buildup as you paint 4. Hold Opt/Alt+Cmd/Ctrl and drag left-right to resize your brush, up-down to soften or harden it 5. To make a custom brush, boost contrast with Levels until your subject is solid black on white, then go to Edit, then Define Brush Preset 6. In Brush Settings, turn on Shape Dynamics and Scattering to add natural size, angle, and opacity variation Get the full step by step breakdown here: https://phlearn.com/tutorial/30-days-photoshop-brush-tool/ ― PHLEARN PRO: every PRO tutorial, one membership ◦ 200+ in-depth courses and masterclasses on Photoshop, Lightroom and photography ◦ 1,000+ downloadable PSDs, RAW images and sample files to follow along ◦ Presets, Photoshop actions and LUTs included ◦ New PRO tutorials every month, streamed in 4K with captions and chapters ◦ Rated 4.93/5 by 3,900+ students ◦ Cancel anytime, 100% money-back guarantee ▶ https://phlearn.com/pro ― Follow PHLEARN: Instagram: https://instagram.com/phlearn Facebook: https://facebook.com/phlearn Twitter: https://twitter.com/phlearn #Photoshop #BrushTool #30DaysOfPhotoshop
Play Video
Play Video
09:52
How to Crop & Resize Images in Photoshop | Day 10
▶ Download the sample images and PDF guide for this tutorial (free with a PHLEARN account): https://phlearn.com/tutorial/30-days-photoshop-crop-resize/ Cropping isn't just for scaling images down, it can also add information to a photo you don't already have. Day 10 of 30 Days of Photoshop covers the Crop tool from ratio presets to content-aware canvas extension. Aaron walks through custom crop ratios, the crop shield and composition overlays (rule of thirds, golden ratio, golden spiral), resizing to an exact resolution while cropping, and using Content-Aware Crop to intelligently generate new image data when you need to extend your canvas. CHAPTERS 00:00 Day 10 of 30 Days of Photoshop: Crop & Resize 00:17 Setting A Custom Crop Ratio 02:19 Delete Cropped Pixels: Why To Leave It Unchecked 02:57 The Straighten Tool 03:40 Crop Shield & Reveal All 04:30 Rule Of Thirds, Golden Ratio & Spiral 05:23 Resizing While You Crop 06:33 Content-Aware Crop To Extend Your Canvas THE STEPS 1. Select the Crop tool (C), then set a custom aspect ratio in the ratio field at the top, or type your own values 2. Uncheck Delete Cropped Pixels before you start, so nothing outside the crop is permanently lost 3. Use the crop shield settings to preview the full image, and choose Image, then Reveal All if you need it back 4. Switch the overlay to Rule of Thirds, Golden Ratio, or Golden Spiral to help place your subject 5. To resize as you crop, type exact width, height, and resolution values into the ratio field, then press Enter 6. Check Content-Aware in the crop tool options, then drag a crop handle outward to let Photoshop generate new image data and extend your canvas Get the full step by step breakdown here: https://phlearn.com/tutorial/30-days-photoshop-crop-resize/ ― PHLEARN PRO: every PRO tutorial, one membership ◦ 200+ in-depth courses and masterclasses on Photoshop, Lightroom and photography ◦ 1,000+ downloadable PSDs, RAW images and sample files to follow along ◦ Presets, Photoshop actions and LUTs included ◦ New PRO tutorials every month, streamed in 4K with captions and chapters ◦ Rated 4.93/5 by 3,900+ students ◦ Cancel anytime, 100% money-back guarantee ▶ https://phlearn.com/pro ― Follow PHLEARN: Instagram: https://instagram.com/phlearn Facebook: https://facebook.com/phlearn Twitter: https://twitter.com/phlearn #Photoshop #30DaysOfPhotoshop #PhotoEditing
Play Video
Play Video
16:54
How to Add Text to a Photo in Photoshop | Day 11
▶ Download the sample images and PDF guide for this tutorial (free with a PHLEARN account): https://phlearn.com/tutorial/30-days-photoshop-type/ Day 11 of 30 Days of Photoshop: learn how to add type to your photos, from choosing a font face and weight to masking text behind your subject and aligning everything perfectly. Aaron builds a fake magazine cover from scratch, covering the Character and Paragraph panels, Adobe Fonts, using different weights of the same font instead of mixing fonts, masking text behind a subject with the Magic Wand tool, and aligning multiple text layers to the document and to each other. CHAPTERS 00:00 Adding type to a photo, Day 11 00:58 Choosing your font face and weight 04:41 Masking text behind your subject 08:26 Centering text with selections and alignment 14:36 Grouping and aligning text to a background box THE STEPS 1. Select the Type tool (T) and add your text 2. Use the Character and Paragraph panels to set font, weight, size, and spacing 3. Select your background with the Magic Wand tool and load it as a layer mask on your text to tuck it behind your subject 4. Unlink the text layer from its mask so you can move them independently 5. Select All (Cmd/Ctrl+A) and use the alignment tools to center text within the document 6. Cmd/Ctrl-click any layer's thumbnail to turn it into a selection for precise alignment 7. Group multiple text layers together to move and align them as one Get the full step by step breakdown here: https://phlearn.com/tutorial/30-days-photoshop-type/ ― PHLEARN PRO: every PRO tutorial, one membership ◦ 200+ in-depth courses and masterclasses on Photoshop, Lightroom and photography ◦ 1,000+ downloadable PSDs, RAW images and sample files to follow along ◦ Presets, Photoshop actions and LUTs included ◦ New PRO tutorials every month, streamed in 4K with captions and chapters ◦ Rated 4.93/5 by 3,900+ students ◦ Cancel anytime, 100% money-back guarantee ▶ https://phlearn.com/pro ― Follow PHLEARN: Instagram: https://instagram.com/phlearn Facebook: https://facebook.com/phlearn Twitter: https://twitter.com/phlearn #Photoshop #TypeDesign #30DaysOfPhotoshop
Play Video
Play Video
08:46
How to Use the Liquify Tool in Photoshop | Day 12
▶ Download the sample images and PDF guide for this tutorial (free with a PHLEARN account): https://phlearn.com/tutorial/30-days-photoshop-liquify/ Day 12 of 30 Days of Photoshop: learn how to change the shape of anything using the Liquify tool, from cleaning up clothing lines to adding volume to hair, with subtle, natural-looking results. Aaron shares how he actually uses Liquify day to day: setting your layer up as a smart object first so your changes stay fully editable, the Forward Warp tool for most of the work, and the Reconstruct brush to undo any area that goes too far. CHAPTERS 00:00 Changing the shape of anything with Liquify 00:57 Converting your layer to a smart object 01:31 Opening the Liquify dialog and Forward Warp tool 03:19 Cleaning up clothing lines with Liquify 05:32 Adding volume to hair with Liquify 06:47 Editing your Liquify smart filter anytime THE STEPS 1. Convert your layer to a Smart Object before applying Liquify 2. Go to Filter, then Liquify 3. Use the Forward Warp tool with a brush larger than the area you're adjusting 4. Keep pressure and density relatively low (around 10-20%) for subtle results 5. Use the Reconstruct brush to undo any area that changed too much 6. Double-click the Liquify smart filter anytime to go back and adjust it Join the free 30 Days of Photoshop Challenge, with sample images, a calendar, and bonus goodies: https://phlearn.com/tutorial/30-days-photoshop-liquify/ ― PHLEARN PRO: every PRO tutorial, one membership ◦ 200+ in-depth courses and masterclasses on Photoshop, Lightroom and photography ◦ 1,000+ downloadable PSDs, RAW images and sample files to follow along ◦ Presets, Photoshop actions and LUTs included ◦ New PRO tutorials every month, streamed in 4K with captions and chapters ◦ Rated 4.93/5 by 3,900+ students ◦ Cancel anytime, 100% money-back guarantee ▶ https://phlearn.com/pro ― Follow PHLEARN: Instagram: https://instagram.com/phlearn Facebook: https://facebook.com/phlearn Twitter: https://twitter.com/phlearn #Photoshop #LiquifyTool #30DaysOfPhotoshop
Play Video
Play Video
13:38
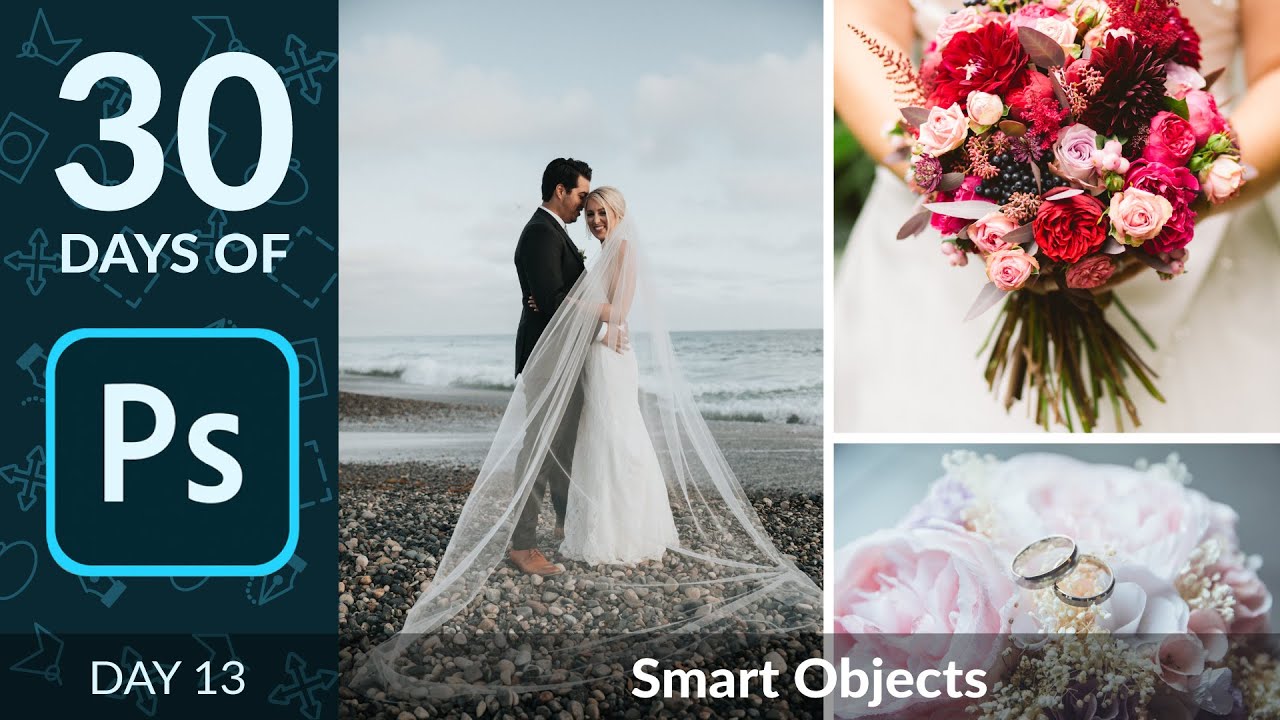
Edit Non-Destructively with Smart Objects in Photoshop | Day 13
▶ Download the sample images and PDF guide for this tutorial (free with a PHLEARN account): https://phlearn.com/tutorial/30-days-photoshop-smart-objects/ Day 13 of 30 Days of Photoshop covers Smart Objects, the single biggest habit change you can make for a non-destructive workflow. Aaron shows exactly what breaks when you resize a normal layer versus a Smart Object, then does the same test with filters. Using four photos built into one collage-style composite, you'll see a regular layer lose real resolution after being shrunk and scaled back up, while the Smart Object version stays perfectly sharp. The same protection applies to filters: any filter applied to a Smart Object becomes an editable, undoable Smart Filter instead of a permanent change. CHAPTERS 00:00 Why Smart Objects matter for editing 01:06 Bringing four images into one document 03:00 Smart Object vs regular layer resize test 05:23 Grouping images with a layer mask 07:18 Rearranging and finishing the photo collage 09:18 Testing filters on smart vs normal layers 10:59 Editing Smart Filters non-destructively 12:51 Final collage and wrap-up THE STEPS 1. Bring multiple images into one document with the Move tool, then crop to the aspect ratio you want. 2. Right-click any layer and choose Convert to Smart Object before resizing it, so scaling down and back up doesn't lose resolution. 3. Compare a regular layer against a Smart Object after the same aggressive resize to see the quality difference for yourself. 4. Use a rectangular selection plus Group (Ctrl/Cmd+G) with a layer mask to reserve space for multiple images in a collage layout. 5. Apply a filter like Unsharp Mask to a Smart Object layer to turn it into an editable Smart Filter you can toggle or adjust later. 6. Alt/Option-drag a Smart Filter from one Smart Object layer onto another to copy the exact same effect across layers. 7. Rasterize a layer only when you're certain you won't need to resize or re-edit it again, since rasterizing removes Smart Object protection. Sign Up for 30 Days of Photoshop: https://phlearn.com/30-days-of-photoshop-signup Join the 30 Days of Photoshop Challenge and get a new free lesson delivered every day, along with sample images and bonus extras. ― PHLEARN PRO: every PRO tutorial, one membership ◦ 200+ in-depth courses and masterclasses on Photoshop, Lightroom and photography ◦ 1,000+ downloadable PSDs, RAW images and sample files to follow along ◦ Presets, Photoshop actions and LUTs included ◦ New PRO tutorials every month, streamed in 4K with captions and chapters ◦ Rated 4.93/5 by 3,900+ students ◦ Cancel anytime, 100% money-back guarantee ▶ https://phlearn.com/pro ――――――――――――――― Follow PHLEARN: Instagram: https://www.instagram.com/phlearn/ Facebook: https://facebook.com/phlearn Twitter: https://twitter.com/phlearn #Photoshop #30DaysOfPhotoshop #PhotoshopTutorial
Play Video
Play Video
08:14
How to Use Blend If in Photoshop | Day 14
▶ Download the sample images and PDF guide for this tutorial (free with a PHLEARN account): https://phlearn.com/tutorial/30-days-photoshop-blend-if/ Blend If is one of the most underused features in Photoshop, and in Day 14 of 30 Days of Photoshop, Aaron shows you exactly how it works. It lets you make any layer visible only in the highlights, midtones, or shadows of your image, which is incredibly powerful for exposure correction and color toning. We start with a simple visual demo of the Blend If sliders, then apply the technique to a real photo, brightening the shadows without blowing out the highlights and warming up just the light-touched areas of the image. CHAPTERS 00:00 Intro to Blend If exposure blending 01:01 How the This Layer slider works 02:51 Feathering sliders for smooth transitions 04:46 The problem with basic Curves brightening 05:28 Using Blend If to protect the highlights 06:09 Color toning just the highlights 07:16 Before, after, and wrap-up THE STEPS 1. Open Blending Options by double-clicking a layer or clicking FX 2. Use the "This Layer" slider to control visibility by that layer's own tones 3. Use the "Underlying Layer" slider to control visibility by the image beneath it 4. Hold Alt/Option while dragging to split a slider and feather the transition 5. Add a Curves Adjustment Layer to brighten shadows 6. Apply Blend If to hide that adjustment from the highlights 7. Add a second Curves layer and use Blend If to warm only the highlights Join the 30 Days of Photoshop Challenge: https://phlearn.com/30-days-of-photoshop-signup ― PHLEARN PRO: every PRO tutorial, one membership ◦ 200+ in-depth courses and masterclasses on Photoshop, Lightroom and photography ◦ 1,000+ downloadable PSDs, RAW images and sample files to follow along ◦ Presets, Photoshop actions and LUTs included ◦ New PRO tutorials every month, streamed in 4K with captions and chapters ◦ Rated 4.93/5 by 3,900+ students ◦ Cancel anytime, 100% money-back guarantee ▶ https://phlearn.com/pro ――――――――――――――― Follow PHLEARN: Instagram: https://www.instagram.com/phlearn/ Facebook: https://facebook.com/phlearn Twitter: https://twitter.com/phlearn #Photoshop #BlendIf #30DaysOfPhotoshop
Play Video
Play Video
11:47
How to Use Blending Modes in Photoshop | Day 15
▶ Download the sample images and PDF guide for this tutorial (free with a PHLEARN account): https://phlearn.com/tutorial/30-days-photoshop-blending-modes/ Welcome to Day 15 of 30 Days of Photoshop! Today Aaron shows off just how powerful Blending Modes can be, letting you build lightning-fast composites and cool color effects without touching a single selection tool or layer mask. Congratulations, you're halfway through the challenge! Blending modes control how one layer interacts with the layers underneath it, and once you understand the handful of groups they fall into, you'll never look at that "Normal" dropdown the same way again. We'll pull a fish out of one background and drop it seamlessly into another, then use color fill layers to grade the whole image, all using nothing but blending modes. CHAPTERS 00:00 Intro to Blending Modes for Compositing 01:12 The Six Blending Mode Groups Explained 03:09 Choosing Screen Mode to Reveal the Fish 04:57 Hiding Stars to Complete the Composite 07:13 Coloring the Image with a Fill Layer 08:30 Using Overlay and Soft Light to Blend Color 09:46 Sampling Colors to Warm Up the Image 11:09 Wrap-Up and Blending Mode Shortcut THE STEPS 1. Move your subject onto the new background, then open the blending mode dropdown above your Layers panel (it defaults to "Normal") 2. Choose a lighten-group mode like Screen if your subject is light on a dark background, or a darken-group mode like Multiply if it's dark on a light background 3. Sample a color from the background on a new layer underneath your subject to hide any distracting elements showing through 4. Add a Solid Color Fill Layer above everything, then cycle through blending modes to grade the image 5. Try Overlay or Soft Light for a subtle, blended color effect, or Color Dodge for something bolder 6. Lower the fill layer's opacity or desaturate its color if the effect feels too strong 7. Sample colors directly from your subject with the Brush Tool and paint them onto a new Soft Light layer to warm up the image 8. Hit V for the Move Tool, then Shift and Plus or Minus to quickly cycle through blending modes without opening the dropdown Join the 30 Days of Photoshop Challenge: https://phlearn.com/30-days-of-photoshop-signup ― PHLEARN PRO: every PRO tutorial, one membership ◦ 200+ in-depth courses and masterclasses on Photoshop, Lightroom and photography ◦ 1,000+ downloadable PSDs, RAW images and sample files to follow along ◦ Presets, Photoshop actions and LUTs included ◦ New PRO tutorials every month, streamed in 4K with captions and chapters ◦ Rated 4.93/5 by 3,900+ students ◦ Cancel anytime, 100% money-back guarantee ▶ https://phlearn.com/pro ――――――――――――――― Follow PHLEARN: Instagram: https://www.instagram.com/phlearn/ Facebook: https://facebook.com/phlearn Twitter: https://twitter.com/phlearn #Photoshop #BlendingModes #30DaysOfPhotoshop
Play Video
Play Video
08:13
How to Remove Distractions in Photoshop | Day 16
▶ Download the sample images and PDF guide for this tutorial (free with a PHLEARN account): https://phlearn.com/tutorial/30-days-photoshop-remove-distractions/ Day 16 of 30 Days of Photoshop: today we're removing distractions like poles, fences, and stray objects from a photo using two tools that work together, the Spot Healing Brush for the easy stuff and the Clone Stamp for anything it can't quite figure out on its own. Start with the Spot Healing Brush every time since it lets Photoshop guess what should fill the gap, then bring in the Clone Stamp when you need full control over exactly which pixels get copied where, especially for structured areas like a horizon line that needs to stay perfectly straight. CHAPTERS 00:00 Removing Distractions With the Spot Healing Brush 01:45 Handling Tricky Spot Healing Areas 03:21 Switching to the Clone Stamp Tool 04:00 Extending the Horizon Line Naturally 04:39 Lowering Flow for Subtle Cloning 06:06 Before and After Comparison THE STEPS 1. Create a new layer, select the Spot Healing Brush, set Mode to Normal, Type to Content-Aware, and check Sample All Layers so your edits stay non-destructive. 2. Paint directly over the distraction, working in smaller areas rather than one large stroke, and let Photoshop fill in the gap automatically using the rest of the image. 3. Right-click to increase your brush hardness if edges look too soft, and paint over any stubborn spot a second time to clean it up. 4. When the Spot Healing Brush leaves an imperfect result, switch to the Clone Stamp tool on a new layer with Mode set to Normal and Sample set to Current & Below. 5. Hold Alt (Option on Mac) and click to sample a clean area, then paint to extend straight lines like a horizon in a natural, seamless way. 6. Lower the Clone Stamp's Flow (or hold Shift and tap a number key) for a softer, more gradual blend when full-strength cloning looks too obvious. 7. Compare your before and after, and if any faint traces remain, sample a fresh area and clone over them again until the repair disappears completely. Confirmed match. Download the sample image and follow along for free: https://phlearn.com/tutorial/30-days-photoshop-remove-distractions/ Sign Up for 30 Days of Photoshop: https://phlearn.com/30-days-of-photoshop-signup ― PHLEARN PRO: every PRO tutorial, one membership ◦ 200+ in-depth courses and masterclasses on Photoshop, Lightroom and photography ◦ 1,000+ downloadable PSDs, RAW images and sample files to follow along ◦ Presets, Photoshop actions and LUTs included ◦ New PRO tutorials every month, streamed in 4K with captions and chapters ◦ Rated 4.93/5 by 3,900+ students ◦ Cancel anytime, 100% money-back guarantee ▶ https://phlearn.com/pro ――――――――――――――― Follow PHLEARN: Instagram: https://www.instagram.com/phlearn/ Facebook: https://facebook.com/phlearn X: https://x.com/phlearn #Photoshop #30DaysOfPhotoshop #PhotoRetouching
Play Video
Play Video
09:55
How to Dodge & Burn in Photoshop | Day 17
▶ Download the sample images and PDF guide for this tutorial (free with a PHLEARN account): https://phlearn.com/tutorial/30-days-photoshop-dodge-and-burn/ Day 17 of 30 Days of Photoshop covers one of the most powerful and common techniques in your toolkit: Dodging and Burning. It's how you recover hidden detail in your shadows and highlights, and how you add real three-dimensional shape to your light. In this lesson, we use Curves adjustment layers and Blend If to selectively brighten and darken a landscape photo, then dodge and burn with a soft, low-flow brush to enhance highlights and add contrast and shape. CHAPTERS 00:00 Dodge And Burn Overview 01:19 Darken Sky With Curves 02:23 Blend If Hides Mountain Darkening 03:43 Brighten Foreground Shadows Only 05:11 Recover Highlight And Shadow Detail 06:28 Dodge With Low Flow Brush 07:38 Burn To Add Shape And Contrast 08:55 Group Layers And Compare Result THE STEPS 1. Add a Curves layer, darken the sky, invert the mask, then paint white over the sky 2. Use Blend If (Alt/Option-drag the highlight slider) to hide the effect from the mountains 3. Add another Curves layer to brighten foreground shadows, using Blend If from the shadow slider 4. Repeat on the trees, hiding the effect from the highlights this time 5. For dodging, use a soft brush at 5% flow and build up light gradually with repeated strokes 6. For burning, use the same low-flow technique with a darkened Curves layer to add contrast 7. Group the dodge and burn layers together and lower opacity for a more subtle effect Join 30 Days of Photoshop, our free step-by-step course: phlearn.com/30-days-of-photoshop-signup ― PHLEARN PRO: every PRO tutorial, one membership ◦ 200+ in-depth courses and masterclasses on Photoshop, Lightroom and photography ◦ 1,000+ downloadable PSDs, RAW images and sample files to follow along ◦ Presets, Photoshop actions and LUTs included ◦ New PRO tutorials every month, streamed in 4K with captions and chapters ◦ Rated 4.93/5 by 3,900+ students ◦ Cancel anytime, 100% money-back guarantee ▶ https://phlearn.com/pro ――――――――――――――― Follow PHLEARN: Instagram: https://www.instagram.com/phlearn/ Facebook: https://facebook.com/phlearn Twitter: https://twitter.com/phlearn #photoshoptutorial #dodgeandburn #phlearn
Play Video
Play Video
13:14
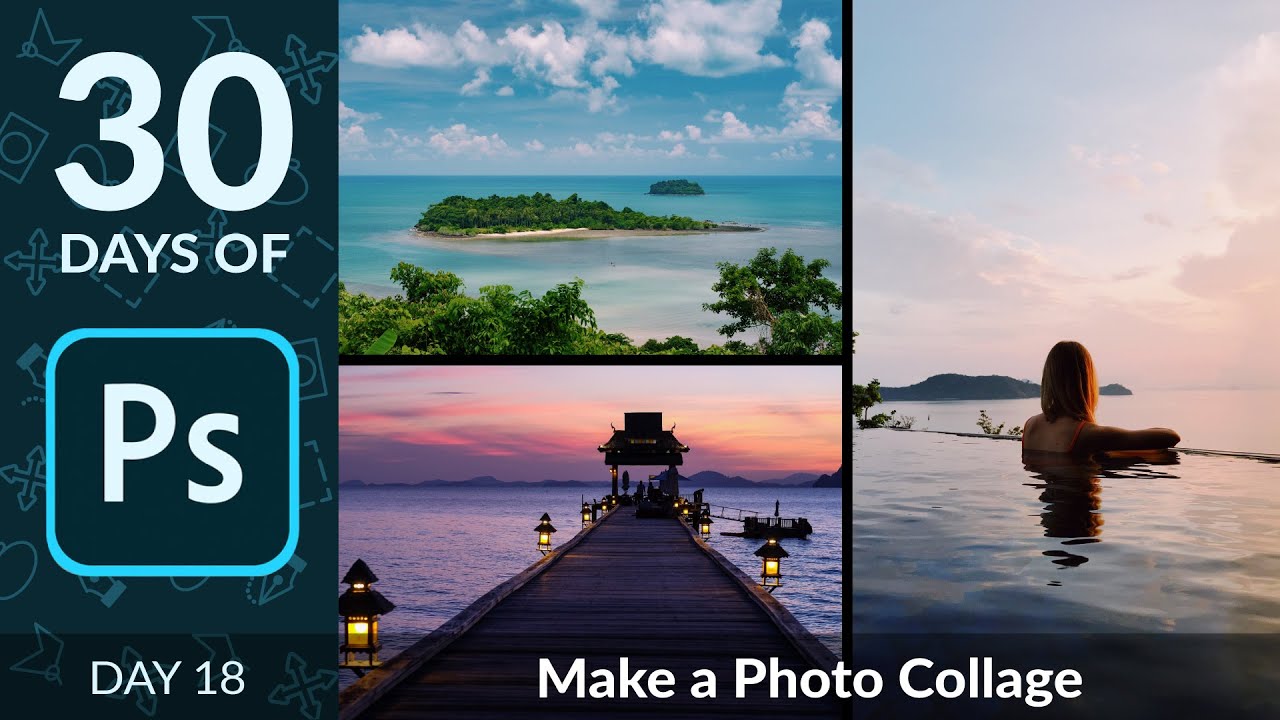
How to Create a Photo Collage in Photoshop | Day 18
▶ Download the sample images for this tutorial (free with a PHLEARN account): https://phlearn.com/tutorial/30-days-photoshop-photo-collage/ Two photo collages, one Photoshop trick — build a grid of clipping-mask squares once, then drop in Smart Object photos that you can resize, swap, and rearrange without ever losing quality. CHAPTERS 00:00 Loading all your images into one document 01:44 Building a 4-square Instagram grid template 04:25 Converting layers to Smart Objects 05:52 Clipping photos into the grid with clipping masks 07:44 Adding a white divider line 09:03 Building an 8x10 print collage template 11:56 Why Smart Objects protect your resizing THE STEPS 1. Go to File, then Scripts, then Load Files into Stack to pull all your source photos into one document at once. 2. Create a new document sized for your collage, then use black squares and Free Transform's percentage fields to build an even grid. 3. Right-click each photo layer and choose Convert to Smart Object before resizing, so shrinking and enlarging never costs you resolution. 4. Drag a photo above one of your grid squares, right-click, and choose Create Clipping Mask (or press Option/Alt+Command/Ctrl+G) so it only shows inside that shape. 5. Transform each clipped photo freely — since it's clipped to its square, you can't accidentally cover the wrong area. 6. Add a thin white marquee selection, fill it, duplicate, and rotate to create simple divider lines between panels. 7. Repeat the grid-and-clip process at print dimensions (8x10 inches at 300 PPI) for a version you can actually print. Sign up for 30 Days of Photoshop: https://phlearn.com/30-days-of-photoshop-signup ― PHLEARN PRO: every PRO tutorial, one membership ◦ 200+ in-depth courses and masterclasses on Photoshop, Lightroom and photography ◦ 1,000+ downloadable PSDs, RAW images and sample files to follow along ◦ Presets, Photoshop actions and LUTs included ◦ New PRO tutorials every month, streamed in 4K with captions and chapters ◦ Rated 4.93/5 by 3,900+ students ◦ Cancel anytime, 100% money-back guarantee ▶ https://phlearn.com/pro ― Follow us on social! Instagram: https://www.instagram.com/phlearn/ Facebook: https://facebook.com/phlearn Twitter: https://twitter.com/phlearn #Photoshop #PhotoCollage #SmartObjects
Play Video
Play Video
11:51
How to Edit RAW Photos in Photoshop | Day 19
▶ Download the sample images and PDF guide for this tutorial (free with a PHLEARN account): https://phlearn.com/tutorial/30-days-photoshop-raw-photos/ Day 19 of 30 Days of Photoshop covers everything you need to start working with RAW images in Adobe Camera Raw, the editor built into Photoshop, Bridge, and Lightroom. RAW files hold far more image information than a JPEG, so edits like white balance and exposure are much more forgiving and your final result ends up higher quality. We work through the essential sliders in Camera Raw's Basic panel, fix lens vignetting and distortion automatically with Profile Corrections, and then use the Radial Filter, Graduated Filter, and Adjustment Brush to make targeted local edits, like glowing highlights in one area or extra saturation on a single object, before the image ever reaches the main Photoshop canvas. We finish with the workflow settings that matter most, color space, bit depth, and opening as a Smart Object so you can always get back into Camera Raw later. CHAPTERS 00:00 Intro to Editing RAW Photos in Photoshop 01:12 Opening a RAW Image in Adobe Camera Raw 02:23 Adjusting Exposure and Lens Corrections 03:44 Exploring Tone Curve and HSL Adjustments 04:53 Using the Radial Filter for Local Glow 06:37 Reviewing the Before and After 08:02 Targeted Edits with the Graduated Filter 09:12 Adjustment Brush and Workflow Settings 10:34 Returning to Camera Raw as a Smart Object THE STEPS 1. Open a RAW file in Photoshop to launch it directly into Adobe Camera Raw, then adjust Temperature and Tint, or pick a white balance preset like Daylight, to correct color. 2. Adjust Exposure, Shadows, and Blacks to balance brightness, then check Lens Corrections and enable Profile Corrections to automatically fix vignetting and lens distortion. 3. Explore the Tone Curve, Detail, and HSL panels to fine-tune contrast, sharpening, and the saturation or luminance of individual color ranges. 4. Select the Radial Filter, drag out a shape, set Effect to Inside, add feathering, then raise Exposure, Temperature, or Saturation to brighten and warm a specific area of the photo. 5. Select the Graduated Filter, drag across the frame, and lower Exposure to darken and vignette an edge, drawing the eye toward your subject. 6. Select the Adjustment Brush, paint over a specific object, and raise Saturation or other settings just for that area; hold Option/Alt while painting to subtract from your brush selection. 7. Before opening the image, set your Color Space to Adobe RGB, Depth to 16 Bits/Channel, and check Open in Photoshop as Smart Object so you can double-click the layer thumbnail later to return to Camera Raw. Sign up for 30 Days of Photoshop at https://phlearn.com/30-days-of-photoshop-signup ― PHLEARN PRO: every PRO tutorial, one membership ◦ 200+ in-depth courses and masterclasses on Photoshop, Lightroom and photography ◦ 1,000+ downloadable PSDs, RAW images and sample files to follow along ◦ Presets, Photoshop actions and LUTs included ◦ New PRO tutorials every month, streamed in 4K with captions and chapters ◦ Rated 4.93/5 by 3,900+ students ◦ Cancel anytime, 100% money-back guarantee ▶ https://phlearn.com/pro ――――――――――――――― Follow PHLEARN: Instagram: https://www.instagram.com/phlearn/ Facebook: https://facebook.com/phlearn Twitter: https://twitter.com/phlearn #Photoshop #CameraRaw #30DaysOfPhotoshop
Play Video
Play Video
07:58
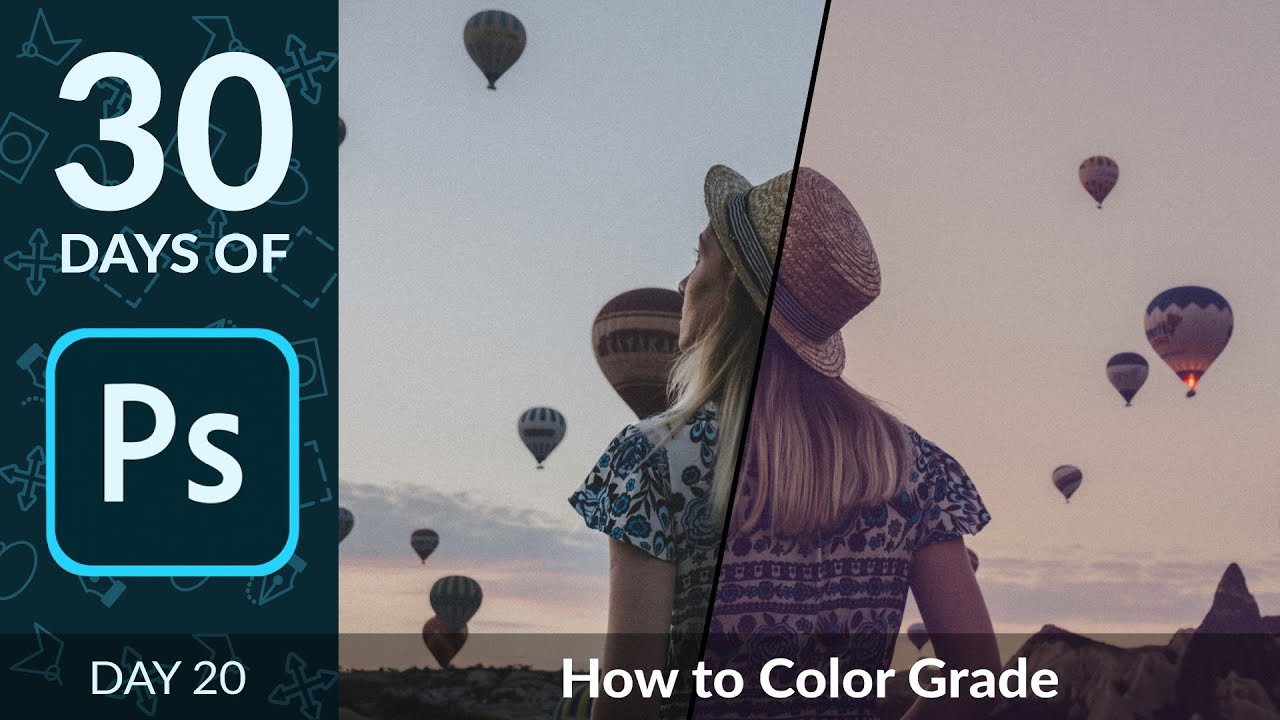
How to Color Grade a Photo in Photoshop | Day 20
▶ Download the sample images and PDF guide for this tutorial (free with a PHLEARN account): https://phlearn.com/tutorial/30-days-photoshop-color-grade-photo/ Day 20 of 30 Days of Photoshop covers one of Aaron's favorite color grading techniques: pushing individual color channels inside a single Levels adjustment layer to tone your highlights, mid-tones, and shadows independently. We break down exactly what each of the four sliders on the red, green, and blue channels does, adding or removing that channel's color from your highlights versus your shadows, then use that understanding to build a cooler blue-shadow, yellow-highlight grade and a second, warmer grade on the same image. We also cover blending multiple grades together by adjusting each adjustment layer's opacity. CHAPTERS 00:00 Intro to Color Grading in Photoshop 00:55 Adding a Levels Adjustment Layer 02:23 How Each Color Channel Affects Tone 03:23 Cooling Shadows and Warming Highlights 05:21 Creating a Second Warmer Color Grade 06:52 Blending Multiple Grades and Wrap-Up THE STEPS 1. Go to Layer, then New Adjustment Layer, then Levels to add a Levels adjustment layer above your image. 2. Switch to the Red, Green, or Blue channel in the Levels panel; dragging the top-left slider pulls that color out of your shadows (adding its opposite color), and the top-right slider adds that color to your highlights. 3. Dragging the bottom-left slider adds that channel's color to your shadows and brightens them, while the bottom-right slider removes it from your highlights and darkens them. Remember: blue/yellow, green/magenta, and red/cyan are opposite pairs. 4. Decide on a mood, for example cooler shadows and warmer highlights, then adjust the Blue channel's sliders accordingly, followed by small adjustments in the Green and Red channels to fine-tune the look. 5. Add a second Levels adjustment layer and repeat the process with a different color combination to create an alternate grade, then compare the two by toggling their visibility. 6. Lower the opacity of either Levels layer, or combine both, to blend two different color grades together until you land on the exact look you want. Sign up for 30 Days of Photoshop at https://phlearn.com/30-days-of-photoshop-signup ― PHLEARN PRO: every PRO tutorial, one membership ◦ 200+ in-depth courses and masterclasses on Photoshop, Lightroom and photography ◦ 1,000+ downloadable PSDs, RAW images and sample files to follow along ◦ Presets, Photoshop actions and LUTs included ◦ New PRO tutorials every month, streamed in 4K with captions and chapters ◦ Rated 4.93/5 by 3,900+ students ◦ Cancel anytime, 100% money-back guarantee ▶ https://phlearn.com/pro ――――――――――――――― Follow PHLEARN: Instagram: https://www.instagram.com/phlearn/ Facebook: https://facebook.com/phlearn Twitter: https://twitter.com/phlearn #Photoshop #ColorGrading #30DaysOfPhotoshop
Play Video
Play Video
05:53
How to Change the Color of Anything in Photoshop | Day 21
▶ Download the sample images and PDF guide for this tutorial (free with a PHLEARN account): https://phlearn.com/tutorial/30-days-photoshop-change-color/ Change the color of literally anything in Photoshop using a Hue/Saturation adjustment layer and the eyedropper tool — no complex selections needed, just click the color you want to change and shift its hue. CHAPTERS 00:00 Adding a Hue/Saturation adjustment layer 00:55 Why the default Master range affects every color 01:26 Isolating a color range with the eyedropper 02:11 Fine-tuning the hue and saturation range 03:38 Adjusting saturation and lightness too 04:46 Cleaning up the edit with a layer mask THE STEPS 1. Open a Hue/Saturation adjustment layer from the Layer menu, then New Adjustment Layer. 2. Switch off Master and choose the color family closest to the color you want to change (yellows, blues, and so on). 3. Grab the eyedropper tool inside the panel and click the exact color on your image to auto-select its range. 4. Drag the hue slider to shift that color range to a new color, and narrow the range sliders if the change bleeds into colors you want to keep. 5. Adjust saturation and lightness on the same layer for a more natural or more dramatic result. 6. Click the layer mask, grab a black brush, and paint over any areas that changed color by mistake. Sign up for 30 Days of Photoshop: https://phlearn.com/30-days-of-photoshop-signup ― PHLEARN PRO: every PRO tutorial, one membership ◦ 200+ in-depth courses and masterclasses on Photoshop, Lightroom and photography ◦ 1,000+ downloadable PSDs, RAW images and sample files to follow along ◦ Presets, Photoshop actions and LUTs included ◦ New PRO tutorials every month, streamed in 4K with captions and chapters ◦ Rated 4.93/5 by 3,900+ students ◦ Cancel anytime, 100% money-back guarantee ▶ https://phlearn.com/pro ― Follow us on social! Instagram: https://www.instagram.com/phlearn/ Facebook: https://facebook.com/phlearn Twitter: https://twitter.com/phlearn #Photoshop #PhotoshopTutorial #HueSaturation
Play Video
Play Video
09:19
How to Correct Exposure in Photoshop | Day 22
▶ Download the sample images and PDF guide for this tutorial (free with a PHLEARN account): https://phlearn.com/tutorial/30-days-photoshop-correct-exposure/ Overexposed highlights and muddy shadows are two of the most common exposure problems, and in Day 22 of 30 Days of Photoshop, Aaron shows you how to fix both with a single technique. Using a Levels Adjustment Layer paired with the Blend If slider, you'll recover detail in blown-out highlights or dark shadows without affecting the rest of your image. The key is targeting your adjustment to just the tonal range that needs it. With Blend If, you can make a Levels layer visible only in the shadows or only in the highlights, then push the contrast in that range as far as you want while the rest of the image stays untouched. CHAPTERS 00:00 Intro to correcting exposure 00:50 Setting up a Levels Adjustment Layer 01:39 Using Blend If to target one tonal range 03:41 Refining shadow contrast with a layer mask 05:36 Correcting overexposed highlights 06:33 Applying Blend If to protect the shadows 07:16 Balancing contrast and opacity 08:33 Before and after, and wrap-up THE STEPS 1. Add a Levels Adjustment Layer above your image 2. Drag the midtone slider to brighten shadows or darken highlights 3. Double-click the layer to open Blend If in Layer Style 4. Hold Alt/Option and drag the underlying layer sliders to isolate shadows or highlights 5. Fine-tune black and white points to add contrast in that range only 6. Use a layer mask to hide the effect from any areas where it looks unnatural 7. Lower the layer opacity to blend the correction in naturally Join the 30 Days of Photoshop Challenge: https://phlearn.com/30-days-of-photoshop-signup ― PHLEARN PRO: every PRO tutorial, one membership ◦ 200+ in-depth courses and masterclasses on Photoshop, Lightroom and photography ◦ 1,000+ downloadable PSDs, RAW images and sample files to follow along ◦ Presets, Photoshop actions and LUTs included ◦ New PRO tutorials every month, streamed in 4K with captions and chapters ◦ Rated 4.93/5 by 3,900+ students ◦ Cancel anytime, 100% money-back guarantee ▶ https://phlearn.com/pro ――――――――――――――― Follow PHLEARN: Instagram: https://www.instagram.com/phlearn/ Facebook: https://facebook.com/phlearn Twitter: https://twitter.com/phlearn #Photoshop #ExposureCorrection #30DaysOfPhotoshop
Play Video
Play Video
08:56
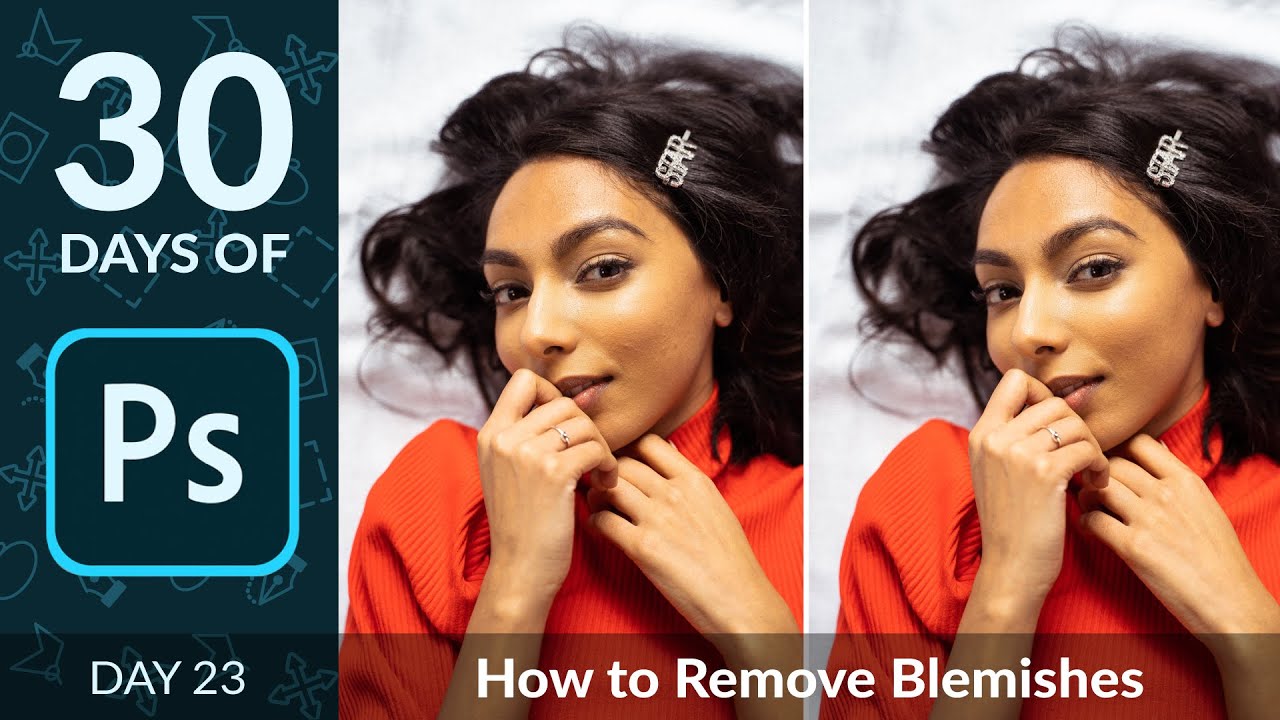
How to Remove Blemishes from a Portrait in Photoshop | Day 23
▶ Download the sample images and PDF guide for this tutorial (free with a PHLEARN account): https://phlearn.com/tutorial/30-days-photoshop-remove-blemishes/ Day 23 of 30 Days of Photoshop, and the first day of our skin retouching series: today we're removing blemishes with the Spot Healing Brush and the regular Healing Brush, and covering a zoom habit that will save you a ton of retouching time. The Spot Healing Brush is fast because Photoshop picks the replacement texture for you, but when it picks wrong, the regular Healing Brush lets you sample your own texture by hand for full control. We also cover why zooming in and out as you work matters just as much as which tool you use, since it's easy to over-retouch details nobody will ever actually see. CHAPTERS 00:00 Zooming In and Out to Spot Blemishes 01:42 Using the Spot Healing Brush Tool 03:05 Switching to the Regular Healing Brush 03:38 Sampling Texture Manually 04:17 Matching Light and Shadow When Sampling 05:17 Zooming Out to Check Your Work 07:52 Before and After Comparison THE STEPS 1. Hold Spacebar and Control/Command, then click and drag right to zoom in or left to zoom out, a fast way to check your work at different zoom levels as you retouch. 2. On a new layer, grab the Spot Healing Brush, set Type to Content-Aware and check Sample All Layers, then simply paint over a blemish to remove it automatically. 3. When the Spot Healing Brush picks the wrong texture, switch to the regular Healing Brush (tap J, or hold Shift+J to cycle nested tools) on a new layer. 4. Hold Alt (Option on Mac) and click to sample a clean area, then paint over the blemish, always sampling from an area with similar lighting, focus, and shadow or highlight level to what you're replacing. 5. Keep your retouching layer opacity at 100% rather than fading it, since a partially-faded heal tends to look less realistic, not more. 6. Zoom out periodically to catch blemishes that are only visible from a normal viewing distance, rather than spending all your time hunting for texture issues you'll never actually see. 7. Leave a few natural marks, like a mole or freckle someone was born with, since retouching skin to total perfection usually looks less realistic, not more. Confirmed match. Download the sample image and follow along for free: https://phlearn.com/tutorial/30-days-photoshop-remove-blemishes/ Sign Up for 30 Days of Photoshop: https://phlearn.com/30-days-of-photoshop-signup ― PHLEARN PRO: every PRO tutorial, one membership ◦ 200+ in-depth courses and masterclasses on Photoshop, Lightroom and photography ◦ 1,000+ downloadable PSDs, RAW images and sample files to follow along ◦ Presets, Photoshop actions and LUTs included ◦ New PRO tutorials every month, streamed in 4K with captions and chapters ◦ Rated 4.93/5 by 3,900+ students ◦ Cancel anytime, 100% money-back guarantee ▶ https://phlearn.com/pro ――――――――――――――― Follow PHLEARN: Instagram: https://www.instagram.com/phlearn/ Facebook: https://facebook.com/phlearn Twitter: https://twitter.com/phlearn #Photoshop #30DaysOfPhotoshop #PortraitRetouching
Play Video
Play Video
14:23
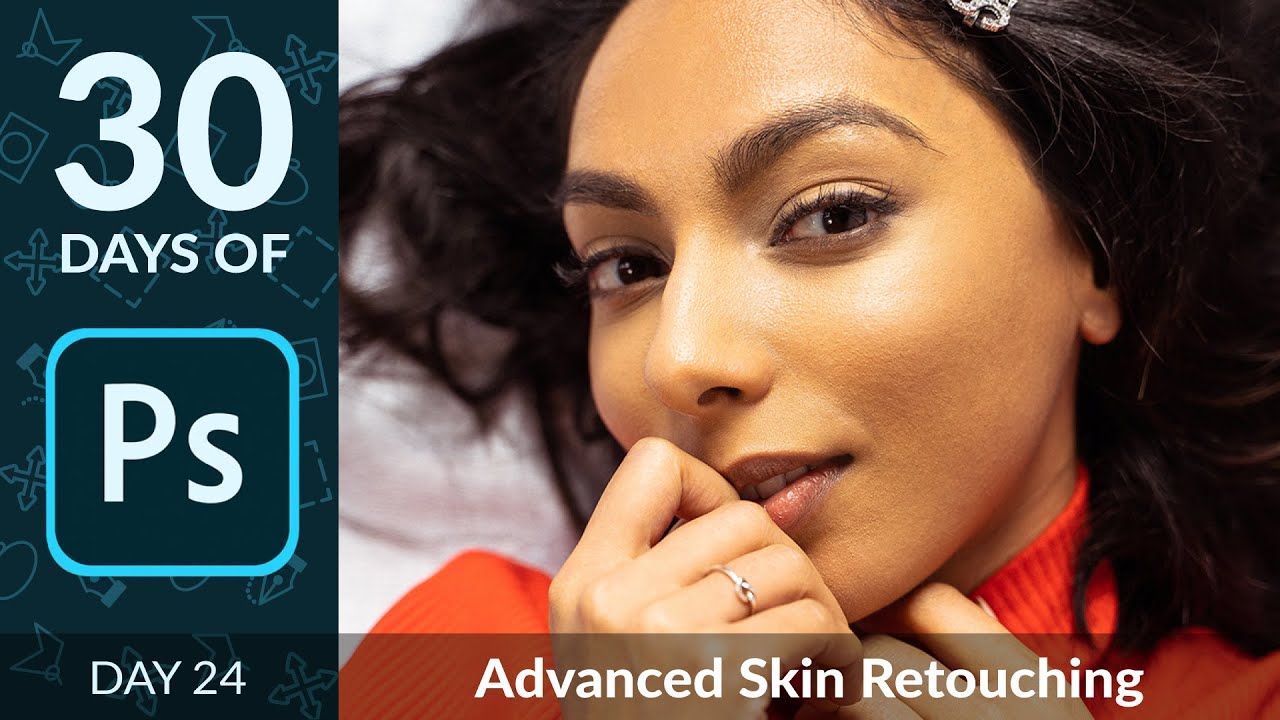
How to Use Frequency Retouching in Photoshop | Day 24
▶ Download the sample image and action for this tutorial (free with a PHLEARN account): https://phlearn.com/tutorial/30-days-photoshop-frequency-separation/ Get the full step by step breakdown here: https://phlearn.com/tutorial/30-days-photoshop-frequency-separation/ It's Day 24 of 30 Days of Photoshop, and we're picking up right where yesterday's blemish removal left off with one of the most powerful retouching techniques out there: frequency separation. It lets you edit the color of skin completely separately from its texture, so you can smooth tone without ever losing real detail. Aaron walks through loading the free Frequency Separation action, splitting your image into a texture layer and a color layer, then using a super low flow brush to blend skin tone and a Clone Stamp trick to clean up stray texture, all while keeping your subject looking like herself. CHAPTERS 00:00 Frequency Separation Intro and Action Setup 01:59 How Frequency Separation Splits Texture and Color 03:26 Sampling and Painting Color at Low Flow 07:50 Smoothing Skin Tone Across the Portrait 09:35 Removing Texture with the Clone Stamp Tool 11:45 Comparing Before and After Results 13:49 Wrap Up and Join 30 Days of Photoshop THE STEPS 1. Load the free Frequency Separation action from Window, then Actions, and choose the 8-bit or 16-bit version to match your image mode. 2. Run the action, then blur about 30 pixels when prompted so no skin texture is visible, then let it build your High Frequency and Low Frequency layers. 3. Understand the split: the High Frequency (HF) layer holds texture, and the layer beneath it holds color. 4. Add a new layer between the HF and LF layers, then set your brush flow to 3-5%, then alt or option-click to sample a color and paint it in gradually to smooth transitions between light and dark. 5. Use a smaller brush on smaller areas and a larger brush for bigger areas, then zoom out while painting so you can judge how colors blend across the whole image. 6. Switch to the High Frequency layer to fix texture issues like flyaway hairs, using the Clone Stamp tool set to Sample Current Layer. 7. Toggle your color and texture layers on and off to compare before and after, then use the eraser tool to undo any area that looks overdone. Join the 30 Days of Photoshop Challenge: https://phlearn.com/30-days-of-photoshop-signup ― PHLEARN PRO: every PRO tutorial, one membership ◦ 200+ in-depth courses and masterclasses on Photoshop, Lightroom and photography ◦ 1,000+ downloadable PSDs, RAW images and sample files to follow along ◦ Presets, Photoshop actions and LUTs included ◦ New PRO tutorials every month, streamed in 4K with captions and chapters ◦ Rated 4.93/5 by 3,900+ students ◦ Cancel anytime, 100% money-back guarantee ▶ https://phlearn.com/pro ――――――――――――――― Follow PHLEARN: Instagram: https://www.instagram.com/phlearn/ Facebook: https://www.facebook.com/phlearn Twitter: https://twitter.com/phlearn #Photoshop #Retouching #30DaysOfPhotoshop
Load More
Photoshop in 30 days
bottom of page