
From your selection of Skys select an image that has a cloud surrounded by blue sky. If this is a tiny selection check you have some pixels to use.
Crop to closely contain just the cloud of interest - see the marching ants in the image.
Throughout this MAC commands are used. For Windows exchange Command for CNTL.
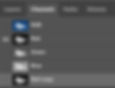
After cropping select Channels and look at the Red, green and blue channels for the most contrasty image (usually red). Right-click that channel and select “duplicate channel”. The default name (Red Copy) is fine.

With the new channel selected press Command + L to bring up the levels box and slightly increase the black slider to make the black part of the image very black. Click OK.
At this stage, you should have a white/grey cloud wholly surrounded by black. Use the lasso/delete or the black paintbrush to tidy up any issues. e.g. you do not want any straight lines on the cloud or artefacts around the edges.
Select the RGB channel then hold down the Command key and click on the Red COPY channel.
You should see marching ants just inside your cloud. If they are well inside the edges of the cloud then press Shift+F6, change the Feather Radius to 0.1 then repeat the above step.
Back to the layers tab (with the cloud image) and press Command + J to duplicate the selection
Select this new layer, convert it to black and white (Shift + Command + U) and invert it to black Command + I. Yay, we have finished "Create a brush (Photoshop)" - how easy was that?

If you have not already created a folder for your brushes, click on the Gear icon at the top right of your Brush Picker (brush picker circled, hit the arrow) to open the menu and choose New Brush Group.
Then give your new Group a name and click OK. Your new Group folder should appear at the bottom of your Brush Picker. If you have a folder simply select it.
Then choose Edit > Define Brush Set > and choose a name “Smoke” for this example.
We now have to modify that specific brush. Click on your brush icon (or click Window > Brushes, or hit F5 and select the Brushes tab). Make sure your new brush is selected, click the menu Brush settings.

Brush settings change depending on the brush type you want. You should play in here. Change something then draw a brush stroke and see if you like it. Here are some starting suggestions;
Click Shape Dynamics and move the slider Size Jitter to 100%.
Same page move the angle jitter up looking at the result. Every brush will be different, 37% worked for me for this one.
Move down a line to Scattering, and move the Scatter up a tad - 5 to 20% ish
Move down to Colour dynamics and move the Foreground/Background jitter to 20% as a starting point. This is how much foreground/background colour is visible in the smoke so adjust to taste.
A final one if you have a tablet. Select Transfer and change two controls to “Pen Pressure”. Close the brushes control (the two chevrons top right).

OK. Load up an image, select your new smoke brush and set the flow low - 10% is a good starting point. Start painting smoke. Wrong colour? Check your foreground colour is white, or whatever colour you need for your smoke. More strokes = denser smoke. Remember the [ and ] adjust the brush size and the tablet pen pressure (if you have one) will increase the density. For mouse users, you may need to use several layers at different layer opacities.
You do know to have a separate layer for smoke (and any other additions) so you can turn it off, or alter it, without disturbing the source image? Especially when playing! This is called non-destructive editing, which is “ a. good. thing. ” and something you should always do.